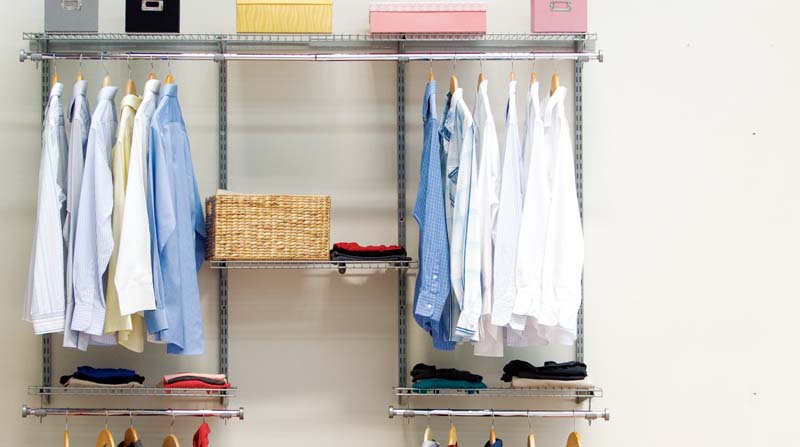
HELP a small closet store more by installing a wire closet system.
Rubber-coated wire shelving is available from a variety of retailers and manufacturers and it can help you make the most of your space. Plus, installing a closet system is super easy.
All it takes is an afternoon and a few common tools and supplies. Before you begin, here are some helpful tips:
Keep it safe: Before installing shelves, check with a professional electrician and plumber to be sure you will not be drilling into electrical wires, ductwork, or plumbing components.
Cover up: If your closet has tile or wood floors, you might wish to cover them with a drop cloth to prevent damage.
Find a friend: For safety reasons, it is best to have a partner present to help install long shelves and hold your step stool when working up high.
Buy extra pieces: If plans change, you will have parts on hand. If not, you can easily return them.
Assess your needs: Most closet systems use closet-gauge wire shelving, but heavier-duty garage systems are also available. Unless you are storing sports equipment or other particularly heavy items, a closet-gauge system will generally fill the bill.
Check in: If your local hardware store will not cut your shelving to size for a nominal fee, consider investing in a bolt cutter for safe, clean cuts.
Cut it short: When trimming shelves, cut a half-inch shorter than the space they will occupy. This prevents scratched walls and makes it easier to fit shelves into wall brackets.
What you need
Tools
Measuring tape, pencil, online design tool, printer, level, drill, rubber mallet and screwdriver.
Materials
Closet system including racks, standards, brackets, shelves, glide mechanisms, drawers, clothing rods and all related hardware. Wall anchors, shelf liners, protective end pieces.
How to do it
Measure and lay out
To start, measure your closet. Write down all relevant dimensions, including depth, width, door swing and light placement. Use an online design tool to create a closet layout. Print the layout, then purchase items from the corresponding list. Before you begin installing, hang the layout on your closet door frame for reference. Unwrap all materials and organise them by the wall where they will reside.
Attach the top rack
Using a level, place the top track or rack and mark holes with a pencil. Drill holes, then insert anchors into holes that do not line up with studs. Tap into the wall with a rubber mallet. With a drill, hang the track or rack, leaving screws a bit loose. Manually tighten screws with a screwdriver to prevent damaging the track.
Attach standards
Next, hang standards from top bracket. Some systems will require hardware (the one shown here does not). Group standards together and insert shelf brackets into the standards. Once brackets are inserted, slide standards to their approximate position on the track, using provided spacers if needed.
Add shelf liners and drawers
To prevent wire marks on clothing and to prevent small items from falling through slats, cover shelves with plastic shelf liners.To add drawers, affix the lowest glide mechanism first, then follow manufacturer instructions to add brackets.
For drawers that share a centre bracket, be sure to use a centre bracket cover. Drop baskets into drawer frames.
Add end pieces and clothing rods
For a finished look, cap shelves and cover exposed brackets with protective end pieces. Follow manufacturer instructions for installing clothing rods, adding support for rods that span longer than 36 inches. –bhg.com