BEFORE you set off on your at-home pedicure journey, make sure you have all the proper tools.
(And because I know you’re thinking it: Don’t worry, we have got some really excellent products throughout this guide if you need some ideas.)
You can decide how basic or fancy you want to get with your supplies, but in general, you’ll want to at least have the following:
Nail polish remover
Foot file or pumice stone
Nail file
Foot cream
Nail polish
Step 1: Prep your nails for your at-home pedicure
Time to finally get rid of the remnants from your last pedi (seriously, how long have you had that chipped-as-hell red?) and do a proper polish removal.
To remove every last bit of colour, soak a cotton pad) and hold it on each nail for a few seconds to allow the paint to break down before you start swiping.
If you want that perfectly smooth, lacquered finish at the end, don’t half-ass this step.
Pro tip: If you are left with any weird stains or a yellow tinge (you will usually see this after removing darker colours, like red or black), rub cuticle oil over the surface of your nails to lighten any residue.
Step 2: Soak your toes and feet
Before you start soaking, your first job and this is important is to go around your house and gather every candle you can find.
Oh, and get yourself a glass of wine while you are at it.
The trick to making an at-home pedicure feel like a spa experience instead of, you know, rubbing your own feet in your too-small-for-comfort apartment, is setting the – mood- at your makeshift pedicure station.
Once the ambiance is right, you are ready to soak your feet which softens tough skin and cuticles (and is downright relaxing).
I suggest using a basin (aka a really big bowl) if you have one but your bathtub is also a sound option.
Fill it up with warm water and add a liberal scoop of skin-soothing bath salts).
Let your feet soak for a few minutes before moving to the next step.
Step 3: Get rid of any dead skin
Okay, so, this is low key my favourite part.
I know, I am weird but it is way satisfying to see how smooth your feet get after rubbing everything off.
After patting your feet dry, grab a foot file or a pumice stone and go ham on your calluses, removing any and all dead skin.
Be sure to really focus in on your heels and any other calloused, hard areas.
Scrape until your feet feel smooth but don’t scrub your feet raw. You could end up causing irritation, which is never fun.
Step 4: Trim your toenails
Once your feet are smooth AF, it is time to whip your toenails into shape.
Reach for classic nail clippers to trim and cut your nails.
Don’t worry about getting the edges perfect you will take care of that in the next step.
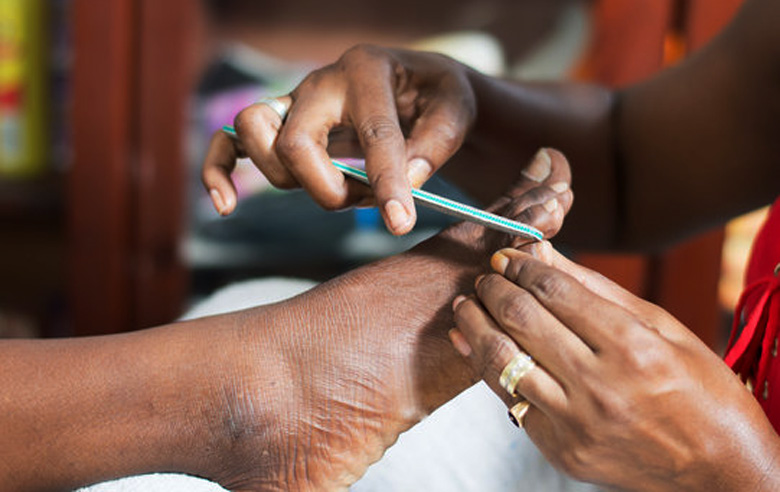
Step 5: Shape your toenails
Now that your toenails are at a perfect length, it is time to smooth them out.
Pick up a nail file and shape the corners and edges.
There is no need to rush during this step take your time filing until all of your nails are even.
Step 6: Add a few drops of cuticle oil
Don’t forget to pay special attention to your cuticles on each toe.
While you can use an orange stick to push back your cuticles, save the trimming or cutting for the pros.
Cuticles protect your nails from bacteria, and you should not trust yourself (or anyone, really) to mess with them especially with that glass of wine in hand.
Instead, show them some love by working in a few drops of cuticle oil. It will make a major difference in their shine, health, and the overall strength of your nails.
Step 7: Massage your feet with lotion
With a foot cream or body lotion, begin massaging your toes, feet, and calves until, well, you wanna stop.
Not only will this massage feel amazing but it will also help hydrate your feet after all that scrubbing and soaking.
Finish off by grabbing a cotton pad soaked with rubbing alcohol to clean the surface of each nail, removing any oily residue that could prevent your polish from sticking.
Step 8: Apply a layer of base coat
If you are thinking that you can skip this step, please reconsider.
Since the base coat acts as a barrier between the natural oils that come from your nails and your actual polish, it is super important to swipe it on if you want your pedicure to last.
And who does not want that?
Step 9: Paint your toenails
If you have toe separators, grab them.
Otherwise, tear off a piece of paper towel, rolling or twisting it into a rope and weaving it through your toes to prevent the polish from smudging.
Apply two thin coats of your colour of choice, letting the paint dry for a few minutes between each coat.
If you are suck at painting inside the lines, use an orange stick to clean any mess-ups.
Step 10: Finish with a top coat
Unless you want your pedicure to chip the next day, you don’t want to skip this step, either.
Layer on a top coat to seal in the nail polish.
You will be left with a super shiny and long-lasting finish. — Cosmopolitan.